What separates your blog from all the others? Is it high-quality content, colors, typography? Perhaps your motivational quotes or the way you can tell a story?
Probably all of the mentioned above.
But, when it comes to blogging, one thing is for sure 一 your visual content strategy must be on point if you want to stand out from the crowd. You need to use darn good imagery if you want to make a name for yourself. Yes, you have read that right 一 using high-quality photos can undoubtedly contribute to your authenticity.
Now, if you are just starting out with your blog, you probably don’t have the resources to hire a professional photographer to create some exquisite images.
Fear not.
We are here to give you a hand and help you do all the work by yourself by naming all the portrait photography tips we know and use. The best thing about these tips? You can easily apply them and teach others to take a photo of you.
To make sure all portrait photography tips are just right and beginner-friendly we asked Igor, Themes Kingdom knight and one of the best photographers in Serbia, to give you a hand. Thank you, Igor, for your help! Additionally, we made sure to include sites that use Themes KingdomWordPress themes and show how they played around with portrait imagery. Learning through examples is the best way to learn.
Let’s begin, shall we?
DSLR vs. mirrorless cameras for portrait photography
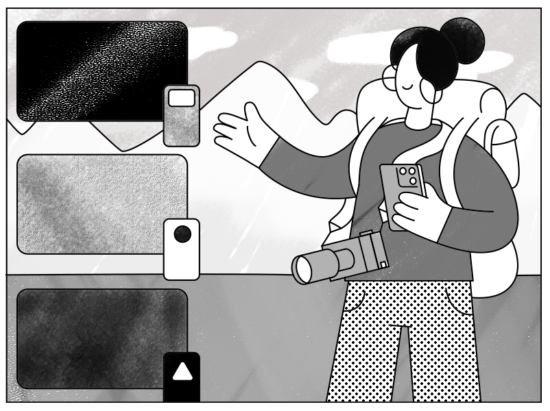
Before we get to the actual portrait photography tips, we have to mention the importance of having the right equipment when taking professional (or at least semi-professional) photos.
Yes, choosing the right camera can be tricky especially since there are so many models with extraordinary features.
For starters, you need to know there are two options when it comes to camera 一 DSLR and mirrorless one.
A DSLR camera is a type of camera that has a mirror which reflects the light coming from the lens up into an optical viewfinder. It has the same design as the 35mm film cameras from the past.
DSLR cameras have a pretty bulky construction but are highly recommendable for low-light shooting and extremely clear images (their autofocus feature is impeccable!). If you are still not sure what cameras we are talking about, just imagine Canon and Nikon models 一 these two are true representations of DSLR cameras. If you want to learn more about DSLR cameras, be sure to check out a post on Expertphotography.com.
Mirrorless camera is any camera that doesn’t have a mirror built-in. These types of cameras are usually a lot smaller the DSLR ones but that doesn’t mean they are more budget-friendly. In fact, mirrorless cameras offer some high-end features, like a pop-up electronic viewfinder. The best features about them are that you get a preview of the image on-screen and take a photo with very fast shutter speed.
Shutter speed is the time that passes between the image sensor “seeing” the scene you are trying to photograph and actually photographing it. It is measured in seconds or second fractions.
Now that you know all of the previously mentioned information, there’s only one thing left to answer 一 should you choose a DSLR or a mirrorless camera. Unfortunately, we cannot give you a straight answer to this question. DSLR cameras offer a wide selection of lenses and amazing optical viewfinders, while the mirrorless ones are more compact and faster. However, if we really had to make a choice, we would say go with the mirrorless ones, especially if you are a beginner and on a budget.
Choosing aperture
In the photography world, the holy trinity consists of aperture, ISO and shutter speed. Aperture’s primary roles are to blur the background and affect the image exposure.
So, how does aperture work?
Aperture is a part of the lens that works the same as your iris does. If you are in a poorly lighted room, the aperture (just like the iris) expands and vice versa. This only means that you can shrink and expand the aperture to allow less or more light to get to the camera lens.
Not only does the aperture control light passing, but it can also blur the background. A large aperture blurs the background in a large amount and the vice versa. So, one of our first portrait photography tips would be to use a large aperture when taking a portrait photo.
Now that you know how aperture works, all that is left to do is to learn how to manage it. Aperture is expressed as the f-number, like f/2, for example. This number describes what the size of the aperture is. The higher the number, the lower the aperture is and the other way around. So, for example, f/3.5 stands for a much larger aperture than f/8.
When it comes to taking a portrait photo, we would suggest you opt for a set of wide aperture, somewhere between f/2.8-f/5.6. This way you will make sure that the subject (e.i. you) is completely focused and the background is slightly blurred.
If you are interested in learning more about aperture, check out a post on Photographylife.com.
ISO element
If you want to become better when it comes to taking portrait photos, one of the best portrait photography tips we can give you is to pay attention to ISO.
ISO (International Organization of Standardization) is an element that affects how bright a photo can be but does that a bit differently than aperture.
The basics of ISO is this: the higher the number, the brighter the photo will be.
But, before you go wild with ISO, remember that having a high ISO brightness is not necessarily a good thing. If the photo has a high ISO brightness, it can start to look grainy. In the photography world, this graininess is popularly called noise. This is why ISO should be your last option for brightening the image, after aperture and shutter speed settings.
So, what number should you set ISO to? Well, that depends on how much light there is in the room when you are taking a photo. If it’s a poorly lighted set, we would suggest you increase the ISO up to 3,200. If that is not enough, you can even double the number. Just keep an eye on the photo noise.
Photo shooting location (background & lighting)
Now that you have gotten familiar with the equipment and camera parts, it’s time to think about where you are going to do the photo shooting session. In fact, choosing the location is one of the most significant steps for taking the perfect portrait because it determines how you are going to play with the background and the lighting.
The first thing you have to decide before moving to other portrait photography tips is whether the photo shooting is going to be held indoors or outdoors. Once you cover that part, you can move onto choosing the background.
Unfortunately, when it comes to background, we have no universal tip. It all depends on whether you’ll shoot it inside, in some sort of a studio, or outside. All we can say is that if you decide to do make a studio out of your home, be sure to include backdrops. If you are interested in learning more about choosing the right background for portraits, be sure to check out a post on Adorama.com.
Take a look at a how Futacs Gitta from Futacsgitta.hu created her portrait photo. She used bright background tones which made the perfect contrast with her dark colored hair.

What about lighting, you may ask? Well, the one tip we can give you is to always choose natural lighting. In fact, if you are taking photos outside, it is highly recommendable you do it early in the morning or late afternoon. This way, you will avoid image “burning” having an image with too harsh shadows.
White balance saves the day
Yes, white balance can save the day. More precisely, it can solve two lighting issues.
The first problem comes from the fact that the environment you decide to take a photo in can have an effect on your skin. For example, if you are surrounded by trees, you might start noticing a slight wash of green on your skin.
The second problem is the fact that cameras most commonly pick up mid-tones and that is why you can start noticing that your portrait photos don’t turn out as bright as you want them to.
But, fear not, there are solutions for both of these problems.
The first solution and one of the most significant portrait photography tips is to play with white balance.
White balance is an element which you can adjust to get the most out of the colors of the subject you are photographing. This element adjusts the “temperature” of a photo, eliminating too warm or too cold image tones. The good news is that, nowadays, many cameras offer the option to adjust white balance manually. Or you can just do it when editing an image using some professional tool (like Adobe Photoshop).
Now the second solution. If you started noticing your images are not as bright as they should be, set exposure compensation element to +1. Skin tone will instantly become more radiant and brightened.
Hard vs. soft light
Believe it or not, when it comes to lighting there’s more to having a photoshoot so early in the morning or late afternoon. Professional photographers know how to play with the lighting so they can ensure that the photos they take are the ultimate perfection. More precisely, they know how to use hard and soft light.
What’s the difference between these two types of lightning?
On the one hand, there’s hard light that comes from a source that is smaller than the subject you are trying to photograph. It casts hard shadows and makes stronger contrast, giving you a photo with well-defined highlights and shadows. On the other, soft light makes the between shadows and highlights appear more mellow because this type of light comes from a source that is larger than the subject. If soft light is placed relatively close to the subject, shadows’ edges become softer and highlight more prominent.
Is there a medium light? Yes, yes, there is. Medium light falls somewhere in between hard and soft. It is used in portrait photography because it allows you to catch details while keeping the skin smooth.
A Combination of Both Worlds
Here’s the truth: subject(s) or object(s) you are taking a photo of always look different in different light setting. No shock there, right? That is the reason why the combination of hard and soft light can do wonders for your portrait photo.
Don’t trust us? Imagine taking a photo with dominantly soft light and wanting to add a bit of dimension. How are you going to do so? By adding a bit of hard light, which will create the shadows.
To make sure you know exactly what we are talking about, we reached out to Igor, who analyzed the image posted on Danieladib.blog.

As Igor mentioned, the photographer used soft light on the model’s face. Hard light was used as the backlight or rim light to separate the subject from the background. As he additionally stated, the source of light in the frame is responsible for the flare in the photo.
Taking portraits
Now that the background and lighting is all set, it’s time to start taking pictures.
The first thing you need to remember is that you need to relax when someone is taking a photo of you. Some people are just not that comfortable in front of the camera, and that is O.K. It’s all a learning curve, and with time you will loosen up. Here are some portrait photography tips that we help you master the art of taking and posing for photos.
DON’T follow the rules
Sometimes it’s fun to break the rules and photographers know that well.
So, even if you are supposed to take a portrait photo, that doesn’t mean you should stick to just this one format and hold the camera vertically. In fact, portrait photos are even more interesting in landscape format.
Take photos we included in the Millenio theme as an example. On the homepage, you can see pictures of several models, taken in landscape mode. They are just as beautiful as they would be if a photographer has made them in portrait mode.

Pose like a pro
It’s time to channel your inner Instagram #baddie!
We are not going to lie 一 the way you pose can make a huge difference in your photo. Body language combined with facial expression and photo composition are the key to a fantastic image.
So, before you decide to do a photo shooting, check out what angles work the best for you. Who knows, maybe if you push yourself to smile it looks a bit fake? Additionally, if you are, let’s say, insecure about how big your nose is, you probably wouldn’t want to take a portrait photo from a side. The same thing goes for a double chin, wider jaw or similar.
Let’s take a look at photos posted on Guessjournal.net. As you can see, in the picture on the right (the girl in the red jumpsuit) playing with angles while posing made the model look curvier while keeping all of her proportions.

Sure, practicing in the mirror sounds like a legit move, but that’s not nearly enough. In fact, one of the most significant portrait photography tips you need to remember is that you will look completely different in photos than you do in the mirror and that is perfectly normal. So, if you want to bring in the big guns and wow your website visitors, be sure to check some of the most common posing techniques that will guarantee you get the best possible photos.
Bonus tip: Keep in mind that when you are just making a headshot, the feature that is the closest to the camera will appear larger than it is.
Spice it up with different angles
Who said you can’t play with camera angles? It’s so fun!
The one tip we can give you regarding camera angles is not to do it “just a little bit” as the viewer might start thinking you made a mistake of not holding the camera correctly. Instead, play around with the camera and turn it to one side with a 60 degrees angle.
Catch the mo(ve)ment
There should never be a dull moment on your blog.
So, let’s say you want to show off an outfit, but this time you want to do it a bit differently. You can use the most fun portrait photography tips 一 the movement method.
We imagine you want the focus to be on you, while the background is blurred. To achieve this “look” you’ll need to:
- slow down the shutter speed and
- pan the camera along with your directional path and moving the camera accordingly.
Keep in mind that both of these steps are a bit challenging and that you’ll need a bit of practice before you master them completely.
The first step you need to cover is slowing down the shutter speed. Unfortunately, there is no universal answer on how you should do this step. It all depends on how fast the subject (e.i. you) is moving. Additionally, you need to pay attention to the distance between the camera and the subject.
The second step is panning the camera. The most important thing about panning is that the camera moves as fast as the subject of focus does, along the same direction.
If you want to learn how you can catch the movement, be sure to check out this video on Adorama channel.
No centering
It’s time to face the truth: putting a subject in the center of a photo can make the image seem dull. So, if you want to jazz the composition up, put yourself on the one side of the frame, leaving the space to look into.
If you are not sure what we are talking about, check out the following examples we found on Legeek-cestchic.com.

Black And white images
In the end, all that is left to cover regarding portrait photography tips are duochrome photos, especially the black and white edition.
There is no doubt that black and white photos are elegant. Minimalistic but yet so attractive and easily adjustable to any type of photography.
The truth is that you can never go wrong with black and white. However, if you decide to convert a colored image into a black and white form, make sure the image has a strong color cast, otherwise, the photo will look like 50 shades of gray which is not that desirable. You definitely don’t want the same gray tone applied all over the image.
Here’s how raw and beautiful a black and white photo looked on Saltysweetcollective.com.

What’s next?
After all the trouble you went through by choosing the right camera, location, posing, format, you need to know your job’s not done yet. Bear with us for just a moment.
Now comes the part when you edit those photos to make sure they are perfect.
We are sure you have heard of several photo editing tools, Adobe Photoshop being one of the most popular ones. The truth is that if you don’t know how to use one of these tools properly, you might as well not be a blogger at all.
Note: Themes Kingdom team is not affiliated with Adobe Photoshop nor do we make a commission if you end up purchasing this photo editing tool through referral link in this blog post.
Without getting into too many details regarding image editing, we are just going to mention there are thousands of YouTube tutorials that explain how you can use Adobe Photoshop and other editing tools, so we are confident you won’t have a problem learning it step by step. If you need a good place to start, be sure to check out an article on Fstoppers.com and learn some additional portrait photography tips that include editing images.
Are you ready?
Are you ready to organize a photo shooting and apply all the portrait photography tips we just shared? If you are, let us know how the photo session went and be sure to include the best ones in your new blog theme. May we suggest Stile or Obsucuri for a fashion/lifestyle blog?